As well as helping children appreciate beauty and have opportunities for self-expression, art also gives them plenty of time to develop creative problem solving skills.
Some young children starting daycare, preschool or kindergarten lack experiences with basic art skills, art projects and products.
These students may get frustrated when they see their peers’ successful creations while the ones they make fall apart or do not meet up to what they are trying to achieve.
Teach these 8 basic skills early in the year to help your students feel happy about their results.
1. Teach kids how to use white glue for gluing non paper items
- Put white glue in empty small jars similar to the ones that gift jams come in
- Place a small craft stick in the jar. This makes it difficult for the child to use more than a little dab of glue at a time
- Call the white glue “little dot glue” and teach the kids to use only little dots of white glue when creating in the Imagination Learning Center
- Show students how to keep the pot of glue very close to their projects when they are gluing so the glue does not drip across the table
- Have smaller squares of wax paper cut and show children how to put one under their projects
2. Let children experiment with twist out glue sticks
- Keep the old roll up/ twist type glue sticks from the previous year and use them to teach the kids how to use glue sticks in the beginning of the year.
- Postpone putting out brand new glue sticks until the children have stopped experimenting with how the glue sticks twist up and down, squeezing the glue to find out what it feels like and discovering how much pressure it takes to smear some glue on the paper!
3. Make painting with tempera blocks an independent activity
Make painting and mixing colors an independent learning center activity.
- Put a stool near the sink, so it is easy for children to reach the tap
- Place the painting stations near the sink and keep paper or other wipe up cloths close
- Place drying racks close to the station tables
Teach the following process over and over until the children learn it:
- Get a new paper from the pile
- Put name on the back of the paper with a marker before starting to paint.
- Fill a shallow margarine tub half full with water and carry it to the table
- Get a brush and check that it is clean.
- Put brush in water and then into the discs of tempera paint
- Teach the little chant, “Round and round and round and round, and round and round we go!” This gives time for the child to get lots of paint on their brush for brighter more colourful pictures.
- Hang finished picture on the nearby drying rack
- Clean brush, water pot and table.
6. Teach the basics of easel painting
Help students paint bright colourful easel painting by:
- Providing easels with pots of bright colored paint, large paper and big brushes
- To avoid having all the colors turn to mud early in the day:
- Teach students to use mixing brushes
- First, put red paint on with the the brush from the red paint; put blue paint on with the blue brush in the blue paint, and then use a third brush, the mixing brush, to mix the colors right on the paper
- Keep the mixing brush in a paint pot that has water in it
- Color code brushes and paint pot lids
- Teach students how to remove the papers and fold them over the drying rack
7. Teach cutting with scissors in little steps
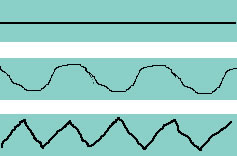
- Provide stiff paper with straight lines on them to teach basic cutting
- As children improve, put curving lines on the paper and finally zigzag lines
- When they master basic cutting with stiffer paper, give them regular paper to cut
- Teach scissor safety
8. Make room for color experiments by limiting color choices
Include room for experimentation and discovery when teaching art for children
- Provide only yellow and blue paint for a few days and let the students play with it to discover colors they can make
- Next, put out only red and blue paint for the next couple of days
- Other days offer only white and red, or white and green
- Allow some time for children to show their pictures and talk about the colors they chose and the new colors that they created