So what are the secondary colors? A fun challenge for children is to ask them to experiment with creating green, orange and purple (the secondary colors) pictures BUT only provide them with red, yellow and blue paint.
If you’re using non-toxic tempera block paints like the ones in the images below, provide plenty of time for the children to play with the paints before giving them this challenge.
I’ve used tempera block paints in the art room often and with good results. A class set is easy to store in an empty photocopy paper box and you can clean the paint trays by running them under the tap.
Keep a few rags, small empty plastic tubs and a set of brushes in the box and they’re ready to go for a group or center art lessons. They make it easy for kids to independently create new colors and to wipe clean with a rag to get back the original colors.
Art Vocabulary
The goal is to introduce art terms to your students as they explore art processes, not to make them memorize vocabulary. Introduce art words as naturally as you would introduce the names of different foods, animals or toys.
Primary colors – the term comes from the Latin, primus, which means first. We should call them first-ary colors!
Red
Yellow
Blue
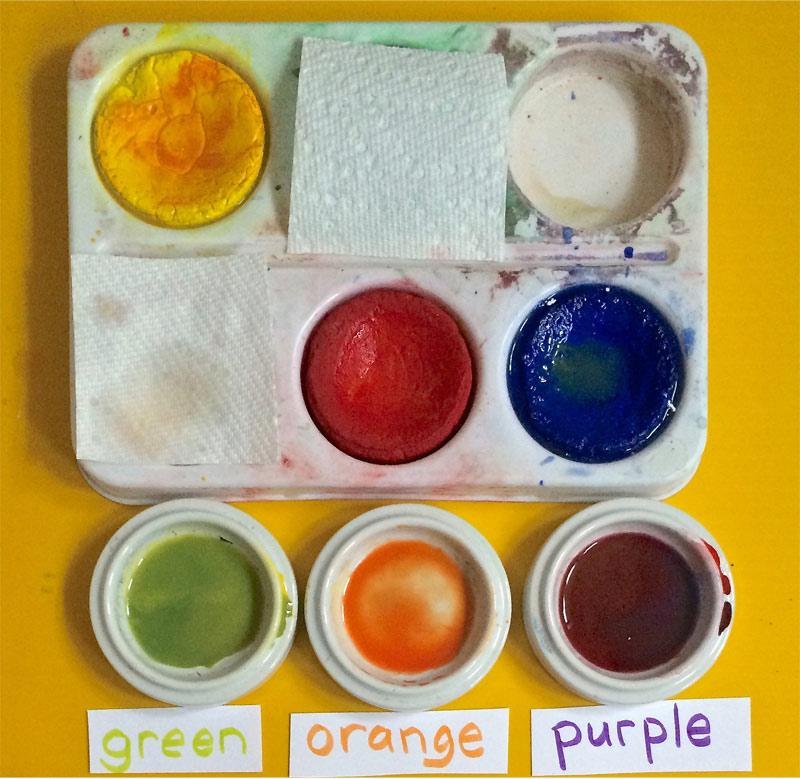
Secondary colors – are made with primary colors.
Green – mix yellow and blue
Orange – mix yellow and red
Purple – mix blue and red
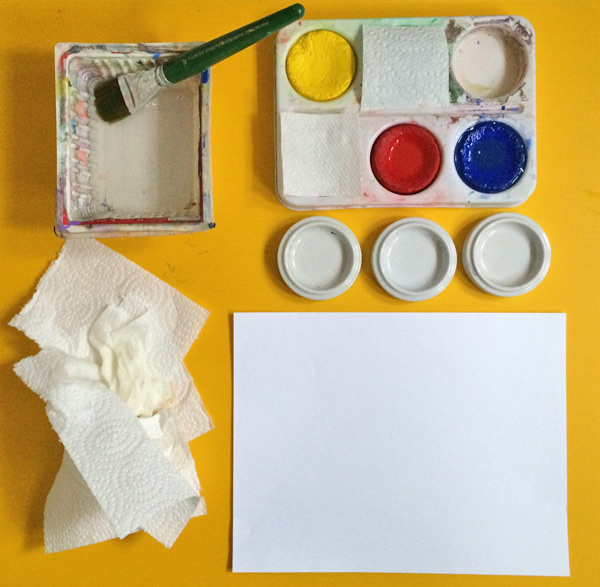
Supplies
Primary paint colors
- red
- yellow
- blue
- (If your paints are in a tray like the ones in the picture above, cover the other colors with paper towels)
3 Mixing trays per child
- one to mix orange
- one to mix green
- one to mix purple
- tops of yogurt or sour cream containers work well
Paint brushes
- one per student
- not too small
Clean up supplies
- Paper towels or baby wipes or rags to clean out mixing trays, surfaces, and hands
Lots of sturdy paper for painting
Water containers to keep brushes clean and to clean off blocks of paint with a clean brush
Drying rack for finished art
Process for experimenting with secondary colors
- Set up your art table or center similar to the picture below.
2. Explain that the challenge is to see if they can create a picture that is only orange, green and purple by using the colors provided.
Optional: If the kids have had little play time with paint, give them only 2 primary colors at a time.
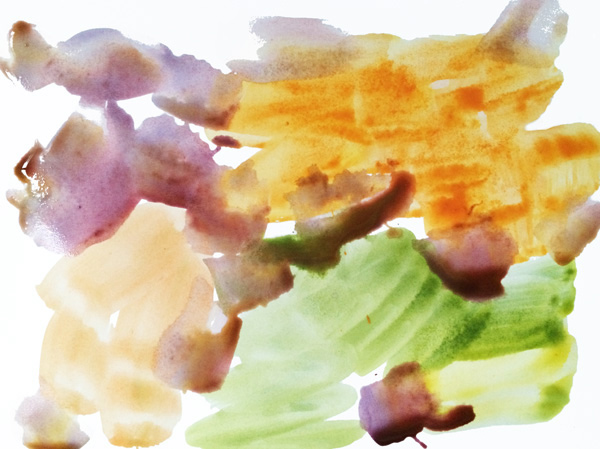
3. The children experiment to create one of or all three of the secondary colors. The key word here is experiment. Rather than telling the children how to make the secondary colors, let them play and discover and talk to their friends about their processes.
4. Invite students to paint a blob picture, stripes or patterns or a representational image. The end product is not important.
Tips for using tempera block paints in the classroom
- Wet the blocks 10 minutes before use to soften pigment.
- Teach children to go “around and around and around” with their brush to avoid pale, watery color.
- Use bigger brushes
- If purchasing new block paints, check the reviews for how the colors wash off clothes. Some brands claim to be washable but the reviews say otherwise. I’ve always liked Prang Brand products for children’s art.
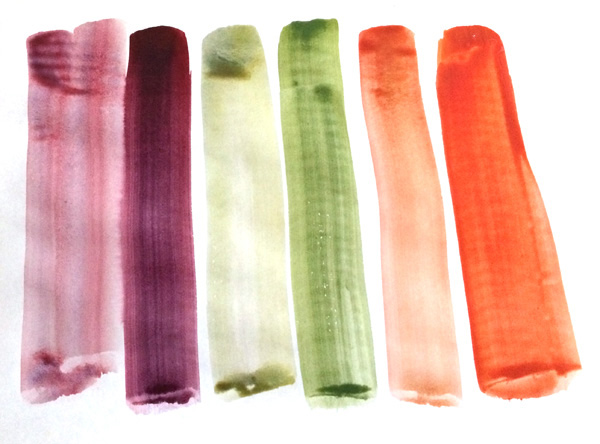
- Compare the results in the image below. The first stripe of each color is created by quickly putting a watery brush in the block of paint, the second stripe is created by going around and around with the brush and is much brighter.
For more tempera paint tips, scroll down this page…
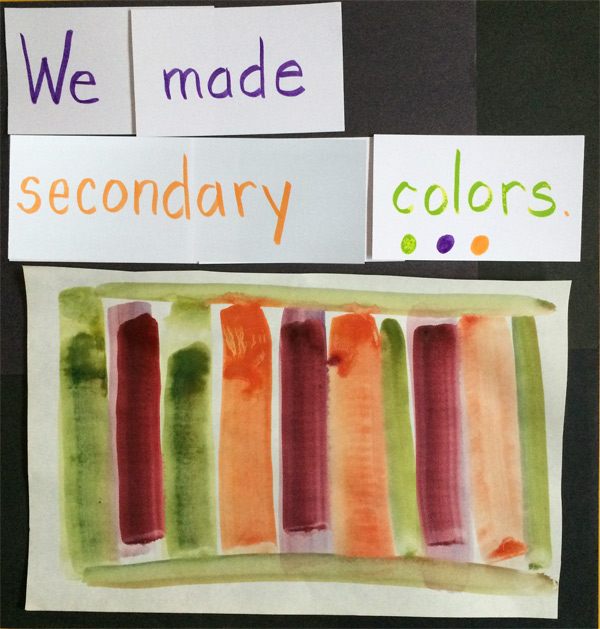
Display the secondary color results
Displaying results on black paper on your bulletin board shows off art the best. Invite the children who would like their end results displayed to add them to the bulletin board.
An explanatory sign helps classroom visitors understand what the display of orange, green and purple blobs are all about!
E.G. We made secondary colors by using red, yellow and blue paint.