There is something wonderful about Spring and the season offers so much inspiration for spring art activities. Longer days, tulips and crocuses and daffodils popping up in the garden, baby farm animals, windy days and beautiful blossoms on the trees are all exciting after the short, dark days of winter.
This Spring art activity is a lesson in observational drawing and a record of the growth of blossoms on a branch of a flowering tree.
Begin by collecting branches just before they blossom from a tree, such as an ornamental plum, a forsythia, fruit trees or a red currant bush. Check that the branches have lots of buds on them. Put five or six branches, about 12 inches long, from the same tree, in your science observation center in a sturdy vase that does not tip too easily.
Spring Art Materials:
- Liquid brown tempera paint
- Construction or other absorbent paper cut in half
- 1 Straw per student (I label them with a file folder sticker)
- Strips of paper for labels (see diagram)
- Green felt markers
- Markers the same colors as the blossoms
Spring Art Lesson
Cover of booklet
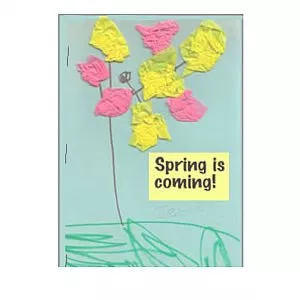
- Draw branches with a thick brown marker
- Students put 1″ squares blossom colored tissue paper around the end of a pencil, dip them into a shallow container of white glue and then press them onto the paper
- Save the page for the cover of the Spring art observation book
- When the students finish the pages below and they are all dry, staple together into a booklet.
1 - Make three branch pictures
- Give each student 3 pieces of construction paper and a straw
- Students put their names on the back of each paper
- Put a blob of brown paint on the bottom of one of the papers
- Show the children how to blow the paint into a branch
- Repeat on two more pieces of paper
Tip! Show the students how to crouch down so their straws are level with the table and blow across the paint rather than down on to it. Tilt the paper slightly to get faster results.
2 - Do this before the branches begin to grow…
- Use the same type of branch for each observation session as tree branches will bloom at different times
- Using a container that does not tip too easily, put one of these branches in the center of each table
- Have the children observe them and comment on what they see
- Introduce the names of the branch parts, stem, buds, leaves
- Prompt with questions - What colors do you see? How do the buds grow, across from each other or above each other?
- Pass out one of each child’s dry, blown paint branch pictures from Day 1
- Ask them to glue a label on the bottom and copy the date from the chalk board (or pass around a date stamp or preprint the labels, depending on your students’ abilities)
3 - Do this when you see changes in the branches, leaves often form first, then blossoms…
- Place a branch in the center of each table in a container that does not tip too easily (old, clean, dish detergent bottles work)
- Prompt with questions - How have the branches changed? What do you see that you didn’t see last time we observed the branches?
- Repeat passing out and labeling picture as in Day 2
- Have students draw changes on their branch pictures, limiting their color choices to the colors on the branches
Day 4 - Do this step when the blossoms are fully out…
- Place the same branches in the center of each table as before and discuss changes
- Repeat passing out and labeling picture as before
- Have students draw changes on their branch pictures using limited color choices
- Optional: Some students glued pink circle stickers on and then drew flower shapes around them(see image above) to make blossoms
- Optional: Have students make labels for the parts of the branch, stem, bud, blossom or print the words and photocopy one per student. Students glue the labels near the plant part and draw an arrow